


 Feel free to hang out and lurk as long as you like. However, we would like to encourage you to
 - Joined
- Dec 8, 2013
- Messages
- 161
- Reaction score
- 8
- Location
- Austin, TX
- First Name
- Frank
- Last Name
- Schaefer
Hi All-
Offering my bike up for a wiring harness build tutorial to make my bike street legal. Here's the story.
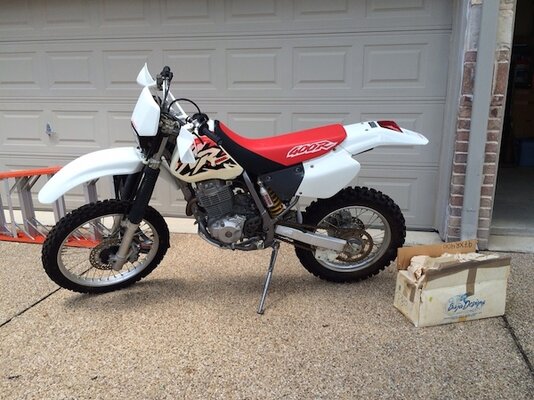
I got a '97XR400R with 100 miles on it. I got a lot of help getting it running from the guys on the XR400 thread. http://www.twtex.com/forums/showthread.php?t=101249
Thrill Billy was cool enough to let me go out to his place and go through the bike with me. After he got his hands on it, it was a 1 kick start bike.
After seeing the wiring harness he built for his bike, I decided to recreate that instead of using the Baja kit. He made a schematic of his set up for me. I'm pretty sure I can do it on my own, but figured we could all learn something about electrical from a ground up wiring harness rebuild on such a simple bike.
I've finally received all the parts. I'd like to start the rebuild sometime after Wednesday, 8/12. The bike will be in my dining room in the comfort of A/C.
Let me know if you're interested. If you have something to show others or something to learn, it's all good. Let's discuss dates.
Like I said, I'm pretty sure I can do this on my own, but like the idea of people having the chance to learn something.
Offering my bike up for a wiring harness build tutorial to make my bike street legal. Here's the story.
I got a '97XR400R with 100 miles on it. I got a lot of help getting it running from the guys on the XR400 thread. http://www.twtex.com/forums/showthread.php?t=101249
Thrill Billy was cool enough to let me go out to his place and go through the bike with me. After he got his hands on it, it was a 1 kick start bike.
After seeing the wiring harness he built for his bike, I decided to recreate that instead of using the Baja kit. He made a schematic of his set up for me. I'm pretty sure I can do it on my own, but figured we could all learn something about electrical from a ground up wiring harness rebuild on such a simple bike.
I've finally received all the parts. I'd like to start the rebuild sometime after Wednesday, 8/12. The bike will be in my dining room in the comfort of A/C.
Let me know if you're interested. If you have something to show others or something to learn, it's all good. Let's discuss dates.
Like I said, I'm pretty sure I can do this on my own, but like the idea of people having the chance to learn something.
")